I thought my recent foray into stop motion animation using mobile devices would be worth a few words.
Timeline
 Prehistory
 : A while ago I bought a cheap model of our solar system from a physics supply shop in South India. It was rusted and had been sitting there in the odd shop for ages. I shipped it back to the UK and it has been taking up space for a while without good reason. Recently, before moving house, I found a reprieve for it by deciding to use it in a stop motion music video.
This blog is a look at how I got from that idea to a finished stop motion animation video and the software, hardware and people observations along the way.
Step 1 : Choose the track.
Step 2 : Storyboard the idea and the props
If you can't draw like your
comic book heroes then a photo based approach to creating a storyboard is a good method. I wanted something on mobile that would let me quickly shoot, arrange and annotate the scenes.
The unbeatable
Cinemek Storyboard on iPhone does this job better than any other. I'm not aware of any compeition. You can just shoot and annotate anywhere meaning when inspiration strikes you move things along quickly. Projects in their early inception stage do depend on thinking done away from desks and desktops. The Cinemek UI is simple and storyboard arranging has a great 'physics' feel and touch making it easy to swap the scenes around.
The screenshots below show how you can use it to
- arrange
- camera movements against scenes : tracking, pans, zooms, focus, lighting. Your still images can come to life.
- add notes and titles
I went and bought a new lamp, some special 'daylight' bulbs, black fabric, plastic bin bags, props, glue, wire and imported a iPhone4 stand from the US (
Naja King). This stand allowed me to hang or stand the iPhone4 camera in all the different angles I imagined I would need. Word of note on the Naja- it can drive you mad with the slight movement it has once the new shape 'settles' thereby skewing the framing down after positioning responds to gravity. Naja has more flexibility and positioning capability than a Gorilla stand but less sturdiness - a trade off.
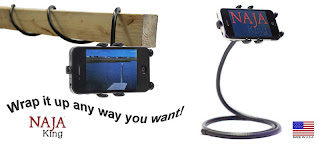 |
| Naja King Flexible iPhone Stand |
|
Step 3 :Choose Stop Motion apps and Prepare to Shoot!
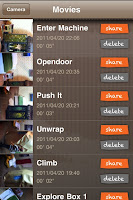 |
| Stop Motion Recorder |
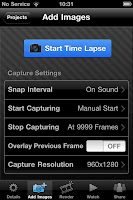 |
| iTimeLapse |
I must have bought and tried out all the stop motion apps that were in the Apple store.
What came out to be most important in the end was how reliable a program was. Losing 30 mins of work every 5 hours is not acceptable even if the application has all the whiz-bang features. iTimelapse wasn't reliable enough. After losing footage and periodic crashes and I resigned iTimeLapse to be a back up only. The trade off with using Stop Motion Recorder was that it was the 12 frames per second and low capture resolution.
Step 4 : Shoot
People-ware : After doing a session or two on my own trying to get finished scenes I knew that an assistant with nimble hands could help me with the separation of shooting and set adjusting roles. Too much movement back and forth from camera to set takes up time and makes the whole thing slow.
I hired someone I knew who studies fine art to help out with further set-making and the shoot. This was a wise move.
We slogged it out and got most of the first half of the video. Stop motion animation is always more effort than you imagine. It's finicky! People say you should double estimates on average - with stop motion you treble it and budget for extra medication.
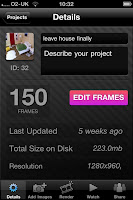 |
High Spec for
iTimelapse |
After my time had expired with the assistant I had to shoot the remainder myself. Mostly the solar system scenes. I noticed that iTimelapse had released a new version of their app and it was more stable. Quandary. Do I double the quality of image capture half way through the shoot or keep with the look/feel I have?
Using the logic that the video was in two halves 1) man in the house) 2) man in the solar system) I convinced myself that it could change resolution for the second half.
I looked more seriously into the audio trigger method on iTimelapse to take a photo i.e. shout "now!" then 'click' a shot is taken. It worked well once the sound levels were tweaked and even the misfires due to my thumping around in the 'scene' positioning things were easily edited out.
I managed to get the rest of the footage.
Step 4.5 - Make the decision about whether to continue developing the project solely on mobile. ..
This was quite a quick decision.
iMovie iOS (the major compositing tool on mobile for video) wasn't suitable because :
- It has some memory problems and performance issues
- I simply needed a bigger screen to see what I had shot. It was time to take a good look.
- No ability to run plugins in-line and a lack of features
- I am more able with Final Cut Express than iMovie so pre-production with the mobile iMovie being imported into PC based iMovie wasn't a draw either
Maybe an iPad would have helped with the bigger screen but at the present time nothing beats editing and compositing on a powerful machine with a big screen.
Desktop and big screen win then.
Step 5 - Import
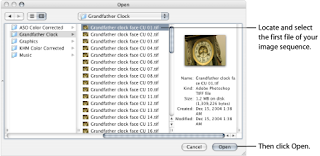 |
| QuickTime import of Image Sequences |
I imported the stop-motion data from my iPhone and quickly filled the iPhoto library up with thousands of photos only slightly different from one another (my wife took it well given it is a shared Mac). I spent some time fixing the orientation of some of the shots, due to the phone gyroscope flipping periodically, and then they were ready to use.
Final Cut Express does not do importing of individual frames to create video so I had to buy
QuickTime Pro to get a good method of creating video footage from a sequence of photos. QuickTimePro also allowed me to specify the exact dimensions of the photos. The mobile apps had cut and trim problems when they exported video which is why I was working in photos and not video by this time.
Step 6 - Edit
 |
| Final Cut Express |
Final Cut Express is a really good tool once you put some time in to learn it. My work with audio editing and compositing is translatable to video editing concepts so I had a quicker start when I first used it.
I have one of the
KB Rubber Keyboard Covers that shows all the Final Cut Express shortcuts which is really useful. Shortcuts for me however are only a band aid as there are so many pieces of software I use that the only real solution for being quick with all my apps would be to have voice recognition.
I used only two plugins very sparingly - a contrast and brightness adjustment to make sure the plastic bin bags representing the cosmos looked dark enough and a plugin called
Lock and Load Express which smooths out shaky footage. Using Lock and Load has a tradeoff though as it selects a subset of the frame which bests stitches with the next frame. Using this approach it finds subset squares per frame as a path through the stills - like threading a needle almost. When shooting at 12 frames a second this was quite noticeable from a textural and resolution standpoint so I restrained to using it only for the manual stop-motion zoom effects I had tried which were very shaky.
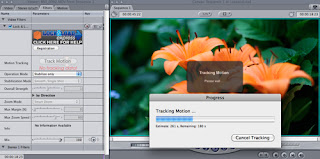 |
| Lock and Load Express |
Step 7 - Master and Export
All done in Final Cut Pro. The export options are very simple and allow you to select high speed broadband as the likely consumption method making a QuickTime file small enough to upload to YouTube and other services.
I had an English and a Spanish version of the video so one export each while muting the other language track.
Step 8 - Promote
To get it indexed properly by the 'machine' I did the following :
- I used Spanish metadata for the Spanish language version whenever posted
- Put direct hyperlinks into the YouTube metadata pointing to my website
- Did a short music blog on Blogger and pinged feedburner.
- Put the video on Musician Profile Aggregator sites such as Artist Data, MusicSubmit
- I wrote this post to improve search engine links. This post is a technical article to create a cross domain link from science and technology into the arts and music
- Put it on my music website (both the front-page, videos section and on the album pages that it was taken from)
- Updated my YouTube channel to have this as the default video
- Put it on MySpace
- Did status update on my personal Facebook and my Facebook music page
- Put it on Twitter with hashtags to catch those searching for video and animation.
I could have done more submissions to other sites (Yahoo, MetaCafe) but I couldn't be bothered - YouTube, Google, Facebook and Twitter and the behemoths for video discovery. If need be I'll add more node juice later on.
I'll keep an eye on Google and YouTube Analytics for now to see how it gets on and whether the Spanish or the English version gets the most eyeballs.
Final
So is it possible to shoot and edit stop motion animation entirely on mobile?
The short answer is that for preparation and capture that mobile is preferable but for editing and mastering the final video piece you still need a big machine.
Enjoy the video!


